Know Working Steps of NFC Data Erasure Software
Follow the Step-by-Step Guide to erase data from multiple storage devices usnig the best data destruction tool
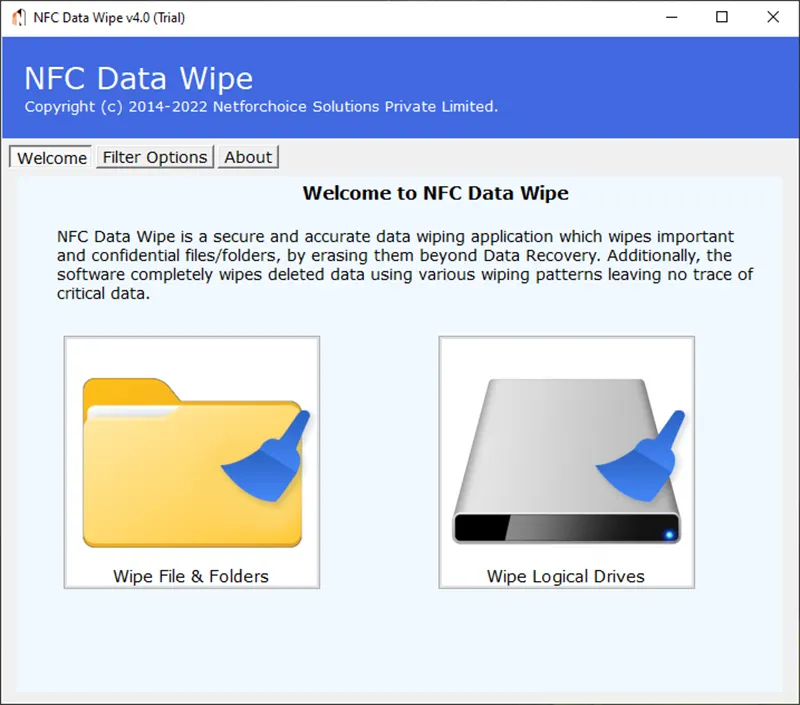
Next users have to select between Wipe File & Folders Option or Wipe Logical Drives.
- Wipe File & Folders: This option let users select files & folders from the local system for data destruction
- Wipe Logical Drives: By selecting this option, the user can erase data of the entire drive: C:\, D:\, E:\, G:\, etc.

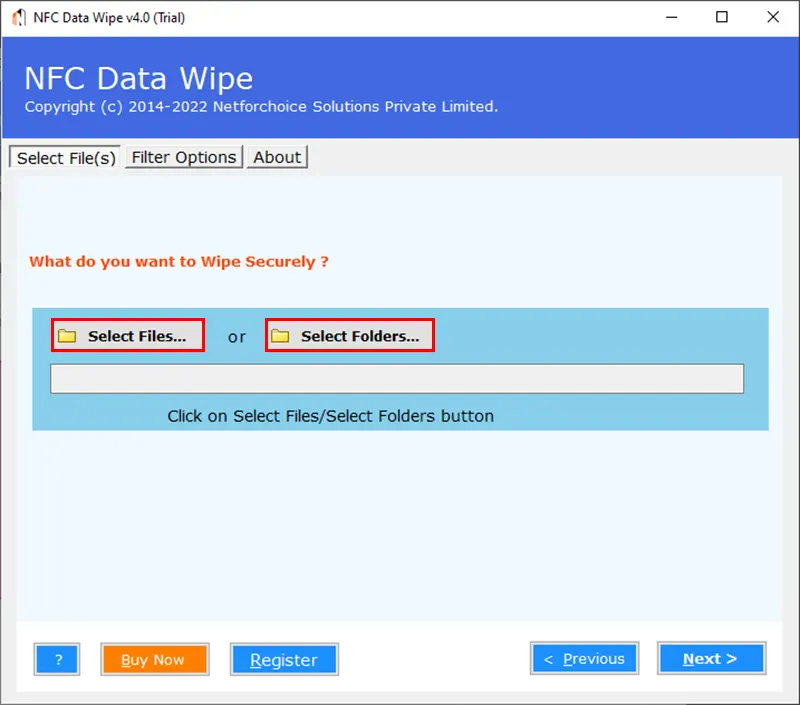
Under Wipe & Folder Category user will get the "Select Files" and "Select Folder" options to upload data.
Afterward, click on the "Add Folders" option, and browse for the required folder as per requirement.
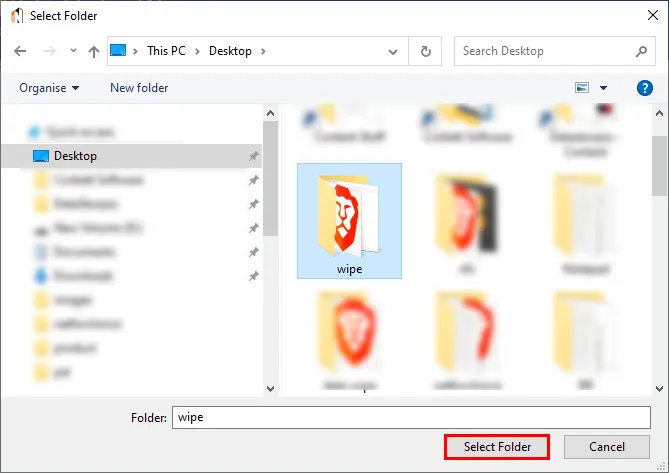
Next, the software will "Add Path" to the directory, click on the "Next" button to move forward.
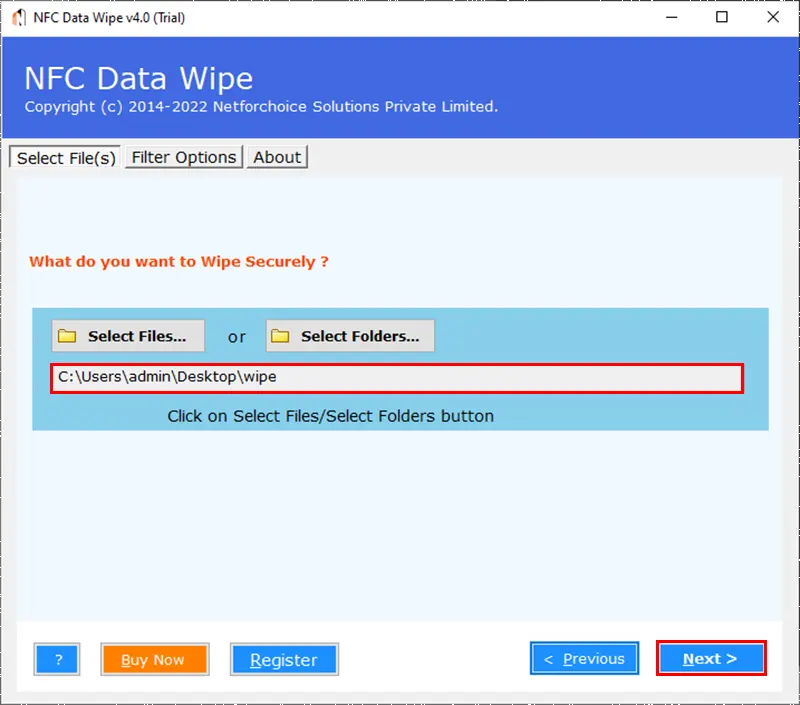
BitWipe Wizard will list all the data on the software panel, users need to check the radio button to select the required files or folders.

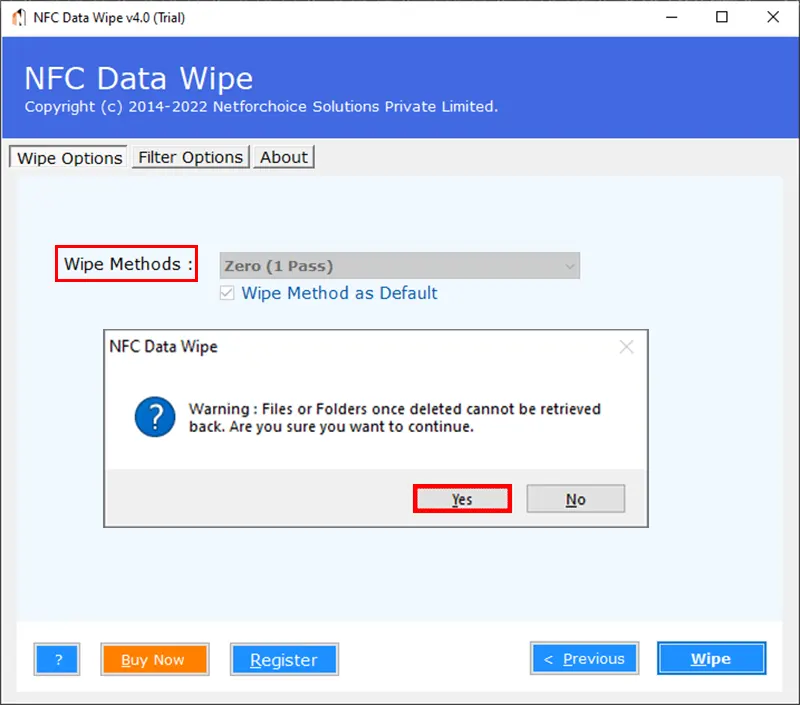
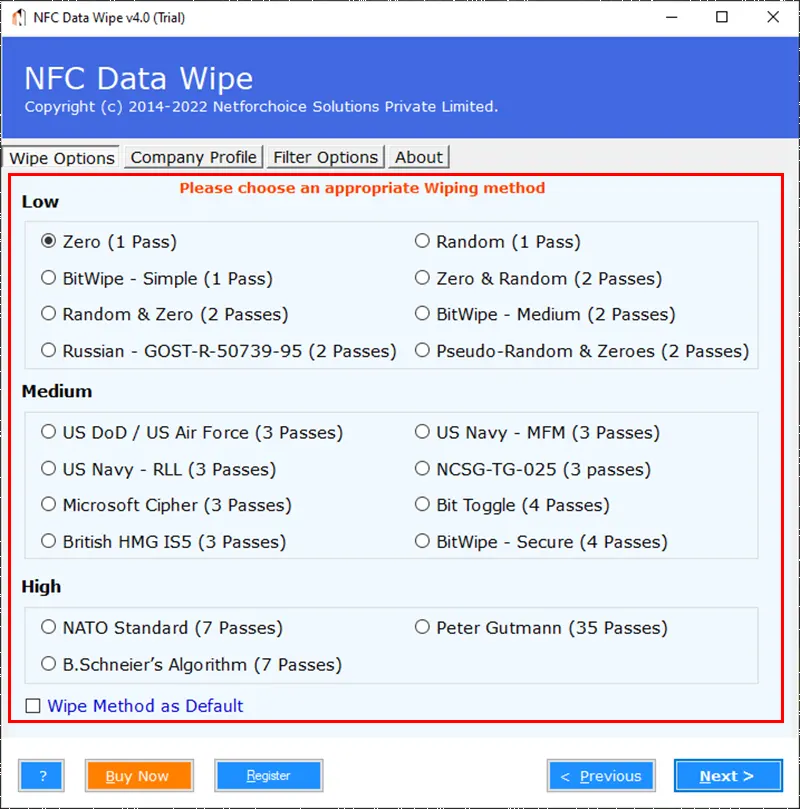
The software offers numerous data wipe options such as Low, Medium, and High which users can select accordingly.
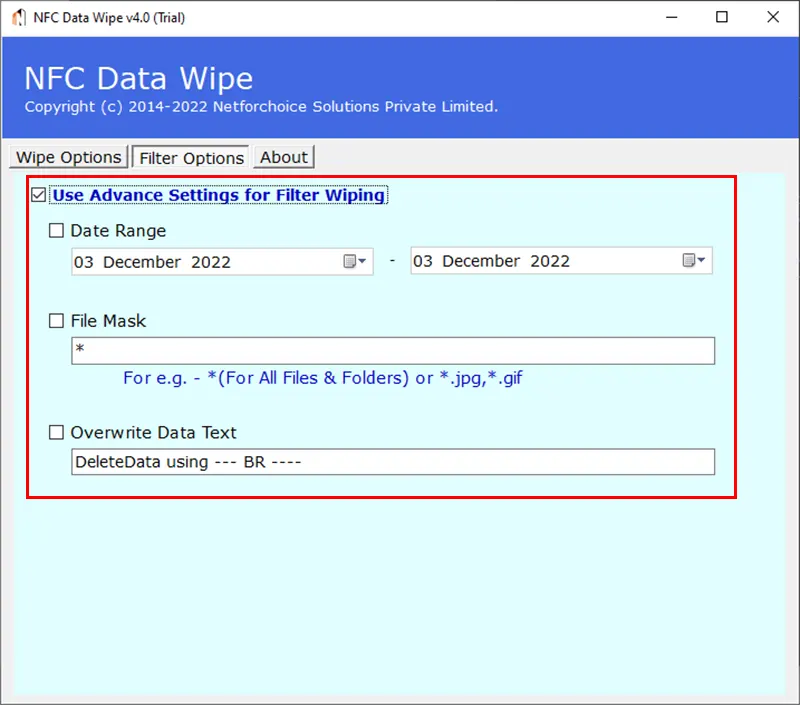
NetForChoice Data Erasure Software also offers multiple data filters to sort the data. Users can sort the data on the following basis.
- Date Range
- File Mask
- OverWrite Data Text