How to Configure Zimbra Mail in Android Mobile device – Updated Guide


It is very much true that we are living in the mobile world era. Everything can be done from a single device – from setting alarm to mail communication.
As it is not always possible to keep desktop with us, it is great to configure Zimbra mail account on the Android mobile to always answer the important business mail at any time.
The installation process only takes a couple of minutes, as it does not require any high-end technical support or experience.
You simply need to follow the installation prompts and instructions to complete the configuration process without any complication.
So let’s get into the blog and learn how to setup Zimbra mail on Android-based smartphone.
In case if you are looking for world’s best Zimbra hosting on cloud, then you can take the help of NetForChoice.
How to Open Zimbra Mail In Android Mobile – Configuration Steps
To be clear first, every Android-based smartphone comprises of somewhat different steps. Here we have compiled all the general steps that need to be required while configuring the Zimbra email account on mobile.
Prerequisites to Install Zimbra Mail in Android
- Administrator should enabled mobility on your account.
- Authorized Zimbra’s email and its associated password.
Note: For your knowledge, the Zimbra mobile supports Android Operating Systems of release 2.1 or later.
Steps to Setup Zimbra on Android Mobile
Here, we have configure Zimbra on Redmi 5 Mobile device that has Android version – 8.1.0. Let’s begin.
Step 1:- Take your phone in your hand and go to the Settings.
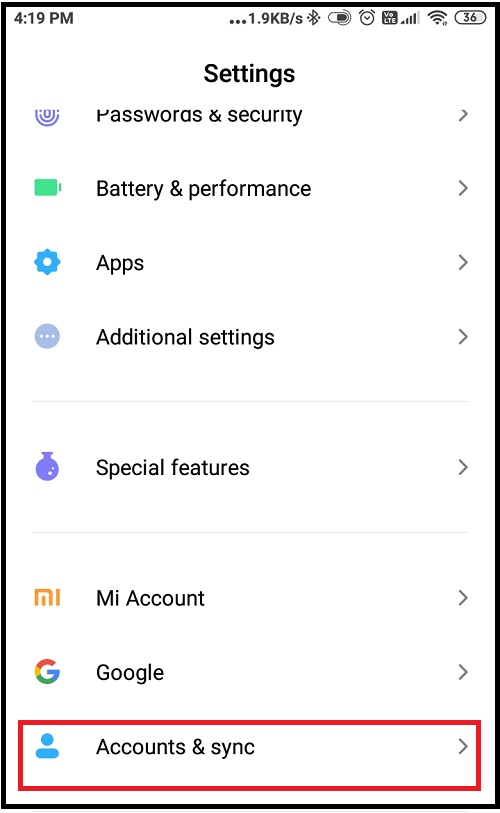
Step 2:- From the Accounts section, tap on Add account option.

Step 3:- Tap either for IMAP or POP3. Here, we have selected the POP3 protocol.
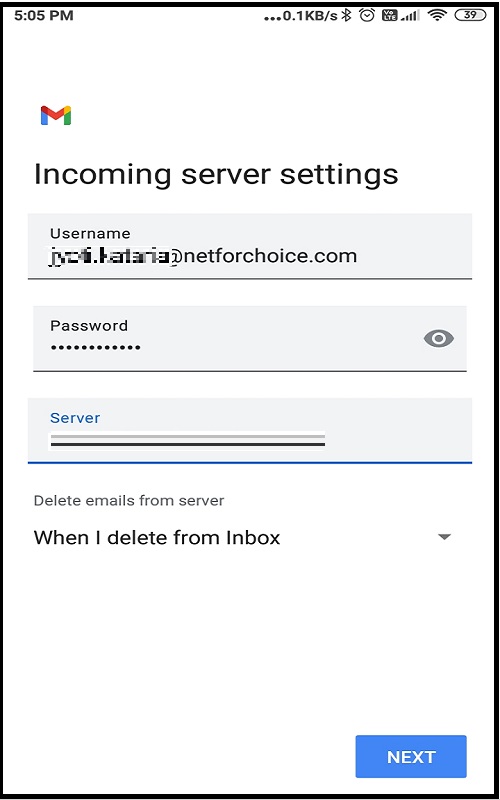
Step 4:- Add the Username, Password, and Server. During configuration, you can either choose Never or When I delete from Inbox from the “Deleted Emails From Server” option. Tap on Next.
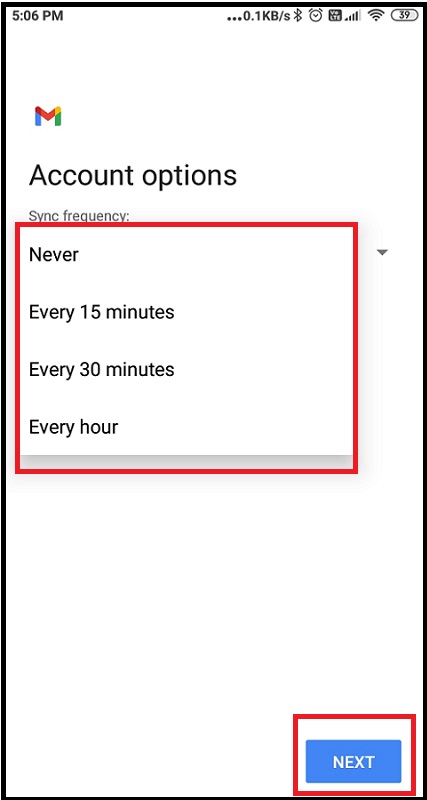
Step 5:- The next page gives you the option of Sync Frequency. Choose the required option and tap on Next.
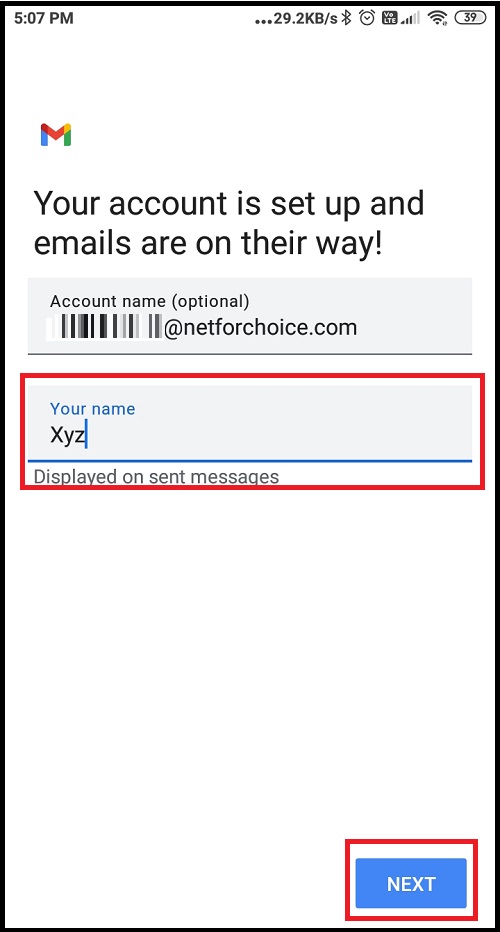
Step 6:- You are done with the Zimbra configuration process on Android mobile. Enter the name that will be going to display on sent messaged and click on Next.
Step 7:- Now open Zimbra mail on your phone.

What Say – Is it easy to setup Zimbra Email on Android or Not?
The Android-based smartphone enables you to sync email, contacts, and calendars from the Zimbra account. So if you do not have your laptop, then you should know how to setup Zimbra mail on Android mobile to get fast access to your messages at any time.